Installation
Replace your ox_target folder in a few minutes. No other resource needs to change.
ox_target Redesigned is a complete ox_target, not an add-on. It takes the place of the ox_target folder you already have, or becomes your first one.
1. Stop the server and back up ox_target
Section titled “1. Stop the server and back up ox_target”Stop the server. If it already has ox_target, copy its folder somewhere outside resources. You can go back to it at any time.
2. Put the folder in place
Section titled “2. Put the folder in place”Delete the old ox_target folder and put the ox_target Redesigned one at the same place. Its name must stay exactly ox_target: scripts call its exports by that name.
Where ox_target usually lives:
resources/[ox]/ox_target, as installed by the Qbox recipe.
The QBCore recipe doesn’t include ox_target. Put it in any category folder, for example resources/[standalone]/ox_target, and start it after ox_lib:
ensure ox_libensure ox_targetOnly scripts made for ox_target, or for qtarget, show their options through it.
The ESX Legacy recipe doesn’t include a targeting resource. Put ox_target in resources/[standalone]/ox_target, and start it after ox_lib:
ensure ox_libensure ox_targetAnywhere in resources, started after ox_lib:
ensure ox_libensure ox_target3. Start the server
Section titled “3. Start the server”Start the server normally. The targeting uses your ox_lib Redesigned theme, or Liquid Dark with the official ox_lib.
Don’t restart ox_target alone while players are connected: the options other resources gave it disappear until those resources restart too. A full server restart is safer.
4. Check that it works
Section titled “4. Check that it works”Join the server and hold Left Alt: the mini eye shows in the middle of the screen. Aim at a vehicle, and its door options show next to it.
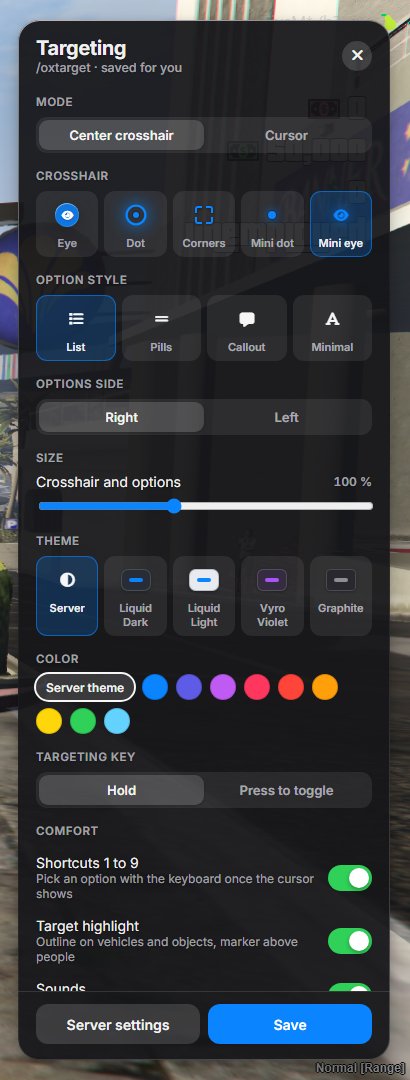
Then type /oxtarget. The settings panel opens, with a live preview: